前言
大家好,这里是 CSS 兼 WebGL 魔法使——alphardex。本文就让我们来用kokomi.js实现一个飘逸的 3D 轮播效果。
(以下 demo 点开全屏观看效果最佳)
https://code.juejin.cn/pen/7141175290247512068
准备
以下是笔者写的 WebGL 图片特效模板,点开并点击右上角的“Fork”即可
https://code.juejin.cn/pen/7142438055843430400
简单地说明一下这个模板吧:
HTML 里是 canvas 元素,用来渲染效果图,同时下面还有一个img图片元素
CSS 里让 canvas 铺满全屏,同时隐藏了 HTML 中的图片元素
JS 里分别定义了最基本的顶点着色器vertexShader和片元着色器fragmentShader,以及一个kokomi.Gallery组件,这个组件的作用是将 HTML 元素和 WebGL 世界进行同步,原理可以看我之前写过的这篇文章,这里封装的 Gallery 组件省下了很多冗余的搭建代码,有兴趣的读者可以查看其源码
一张图片感觉不怎么够,那就多来几张吧,直接将以下的代码分别拷贝至 HTML 和 CSS 中
1
2
3
4
5
6
7
8
9
10
11
12
13
14
15
16
17
18
19
20
21
22
23
24
25
26
27
28
29
30
31
32
33
34
35
36
37
38
39
40
41
42
43
44
45
46
47
48
49
50
51
52
53
54
55
56
57
58
59
60
61
62
63
64
65
66
67
68
69
70
71
72
73
74
| <div id="sketch"></div>
<div class="absolute top-0 h-center">
<div class="h-60"></div>
<div class="relative left-40">
<div class="gallery space-y-16">
<a
class="gallery-item"
href="https://baike.baidu.com/item/%E7%8F%8A%E7%91%9A%E5%AE%AB%E5%BF%83%E6%B5%B7/57959937?fr=aladdin"
target="_blank"
>
<img
class="gallery-item-img"
src="https://s2.loli.net/2022/09/08/gGY4VloDAeUwWxt.jpg"
crossorigin="anonymous"
alt=""
/>
</a>
<a
class="gallery-item"
href="https://baike.baidu.com/item/%E7%94%98%E9%9B%A8/54563073?fr=aladdin"
target="_blank"
>
<img
class="gallery-item-img"
src="https://s2.loli.net/2022/09/08/wSYFN2izrMLulxh.jpg"
crossorigin="anonymous"
alt=""
/>
</a>
<a
class="gallery-item"
href="https://baike.baidu.com/item/%E7%A5%9E%E9%87%8C%E7%BB%AB%E5%8D%8E/58087675?fr=aladdin"
target="_blank"
>
<img
class="gallery-item-img"
src="https://s2.loli.net/2022/09/08/wX7tYIB9FCl1nQm.jpg"
crossorigin="anonymous"
alt=""
/>
</a>
<a
class="gallery-item"
href="https://baike.baidu.com/item/%E5%B7%B4%E5%B0%94%E6%B3%BD%E5%B8%83/58433812?fromtitle=%E9%9B%B7%E7%94%B5%E5%B0%86%E5%86%9B&fromid=57957800&fr=aladdin"
target="_blank"
>
<img
class="gallery-item-img"
src="https://s2.loli.net/2022/09/08/VznrujcI9Z5dKsf.jpg"
crossorigin="anonymous"
alt=""
/>
</a>
<a
class="gallery-item"
href="https://baike.baidu.com/item/%E8%83%A1%E6%A1%83/55490178?fr=aladdin"
target="_blank"
>
<img
class="gallery-item-img"
src="https://s2.loli.net/2022/09/08/yVnNXYfp7wFgAJZ.jpg"
crossorigin="anonymous"
alt=""
/>
</a>
</div>
</div>
<div class="h-60"></div>
</div>
<div class="fixed v-center left-50">
<div class="flex flex-col space-y-4 text-white">
<div class="char-name text-6xl whitespace-no-wrap"></div>
</div>
</div>
|
1
2
3
4
5
6
7
8
9
10
11
12
13
14
15
16
17
18
19
20
21
22
23
24
25
26
27
28
29
30
31
32
33
34
35
36
37
38
| body {
margin: 0;
overflow: hidden;
}
#sketch {
width: 100vw;
height: 100vh;
background: black;
}
body {
overflow: visible;
}
img {
opacity: 0;
}
#sketch {
position: fixed;
z-index: 0;
width: 100vw;
height: 100vh;
overflow: hidden;
background: #424b59;
}
.gallery {
display: flex;
flex-direction: column;
}
.gallery .gallery-item-img {
width: 25rem;
height: 14rem;
cursor: pointer;
}
|

接下来,让我们正式开始 WebGL 部分
开始
倾斜效果
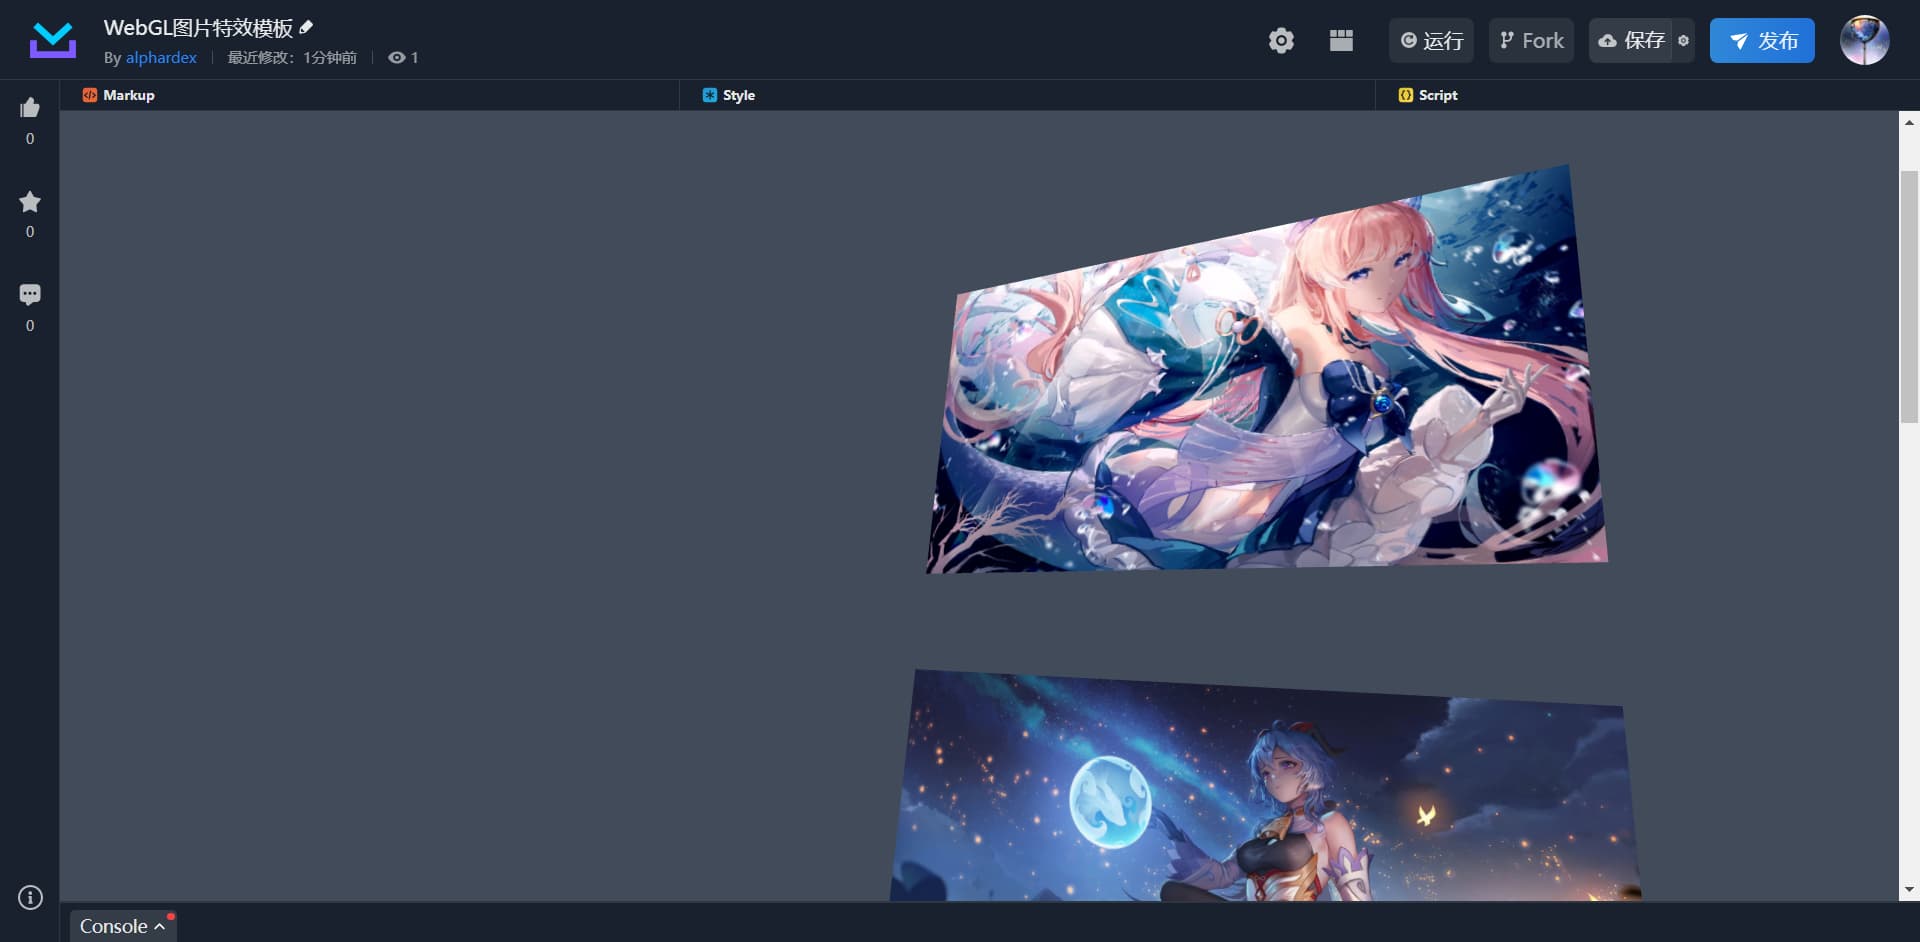
创建一个组,将图片的所有网格元素放入组中,再对组进行旋转变换,即可达成整体变换的效果,这里的旋转度数可以自行微调,只要够酷就行~
1
2
3
4
5
6
7
8
9
| const g = new THREE.Group();
gallary.makuGroup.makus.forEach((maku) => {
g.add(maku.mesh);
});
this.scene.add(g);
g.rotation.y = -THREE.MathUtils.degToRad(30);
g.rotation.x = -THREE.MathUtils.degToRad(18);
g.rotation.z = -THREE.MathUtils.degToRad(6);
|
浮动效果
这里只要是通过动态增减顶点和 uv 坐标的 y 轴来模拟浮动的效果
编写顶点着色器vertexShader
1
2
3
4
5
6
7
8
9
10
11
12
| void main(){
vec3 p=position;
vec2 u=uv;
p.y+=sin(iTime*2.)*.02;
u.y-=sin(iTime*2.)*.02;
gl_Position=projectionMatrix*modelViewMatrix*vec4(p,1.);
vUv=u;
}
|
这里用到了 sin 函数,因为它的函数图形是上下波动的
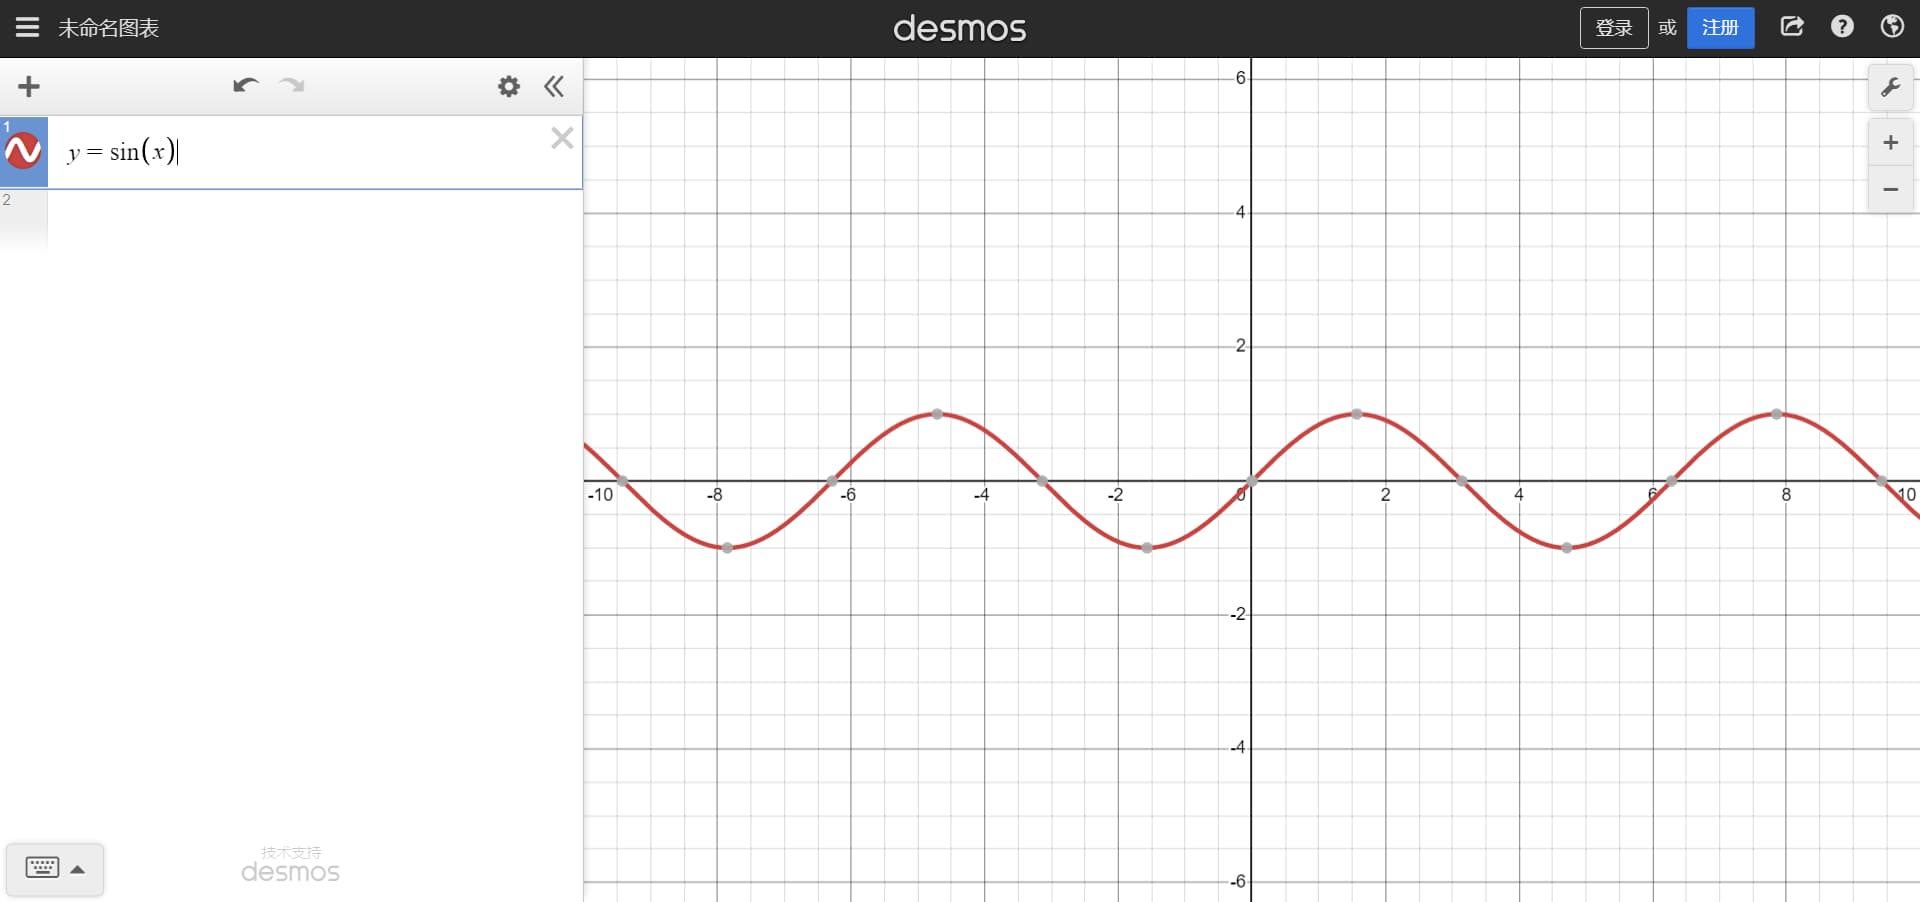
因此根据时间变化的量也能得到一个波动的值,用它来控制顶点和 uv 的 y 轴即可

扭曲效果
在扭曲图片前,先将 js 里的 gallery 组件更改为以下配置
1
2
3
4
5
6
7
| const gallary = new kokomi.Gallery(this, {
vertexShader,
fragmentShader,
makuConfig: {
meshSizeType: "scale",
},
});
|
这里我们将图片网格的创建方式改成了缩放形式,PlaneGeometry本身的长宽都变成了 1,这样我们就能随意地扭曲顶点坐标了
编写顶点着色器vertexShader
1
2
3
4
5
6
7
8
9
10
11
12
13
14
| const float PI=3.14159265359;
void main(){
vec3 p=position;
vec2 u=uv;
...
p.y+=sin(PI*u.x)*.05;
p.z+=sin(PI*u.x)*.1;
...
}
|
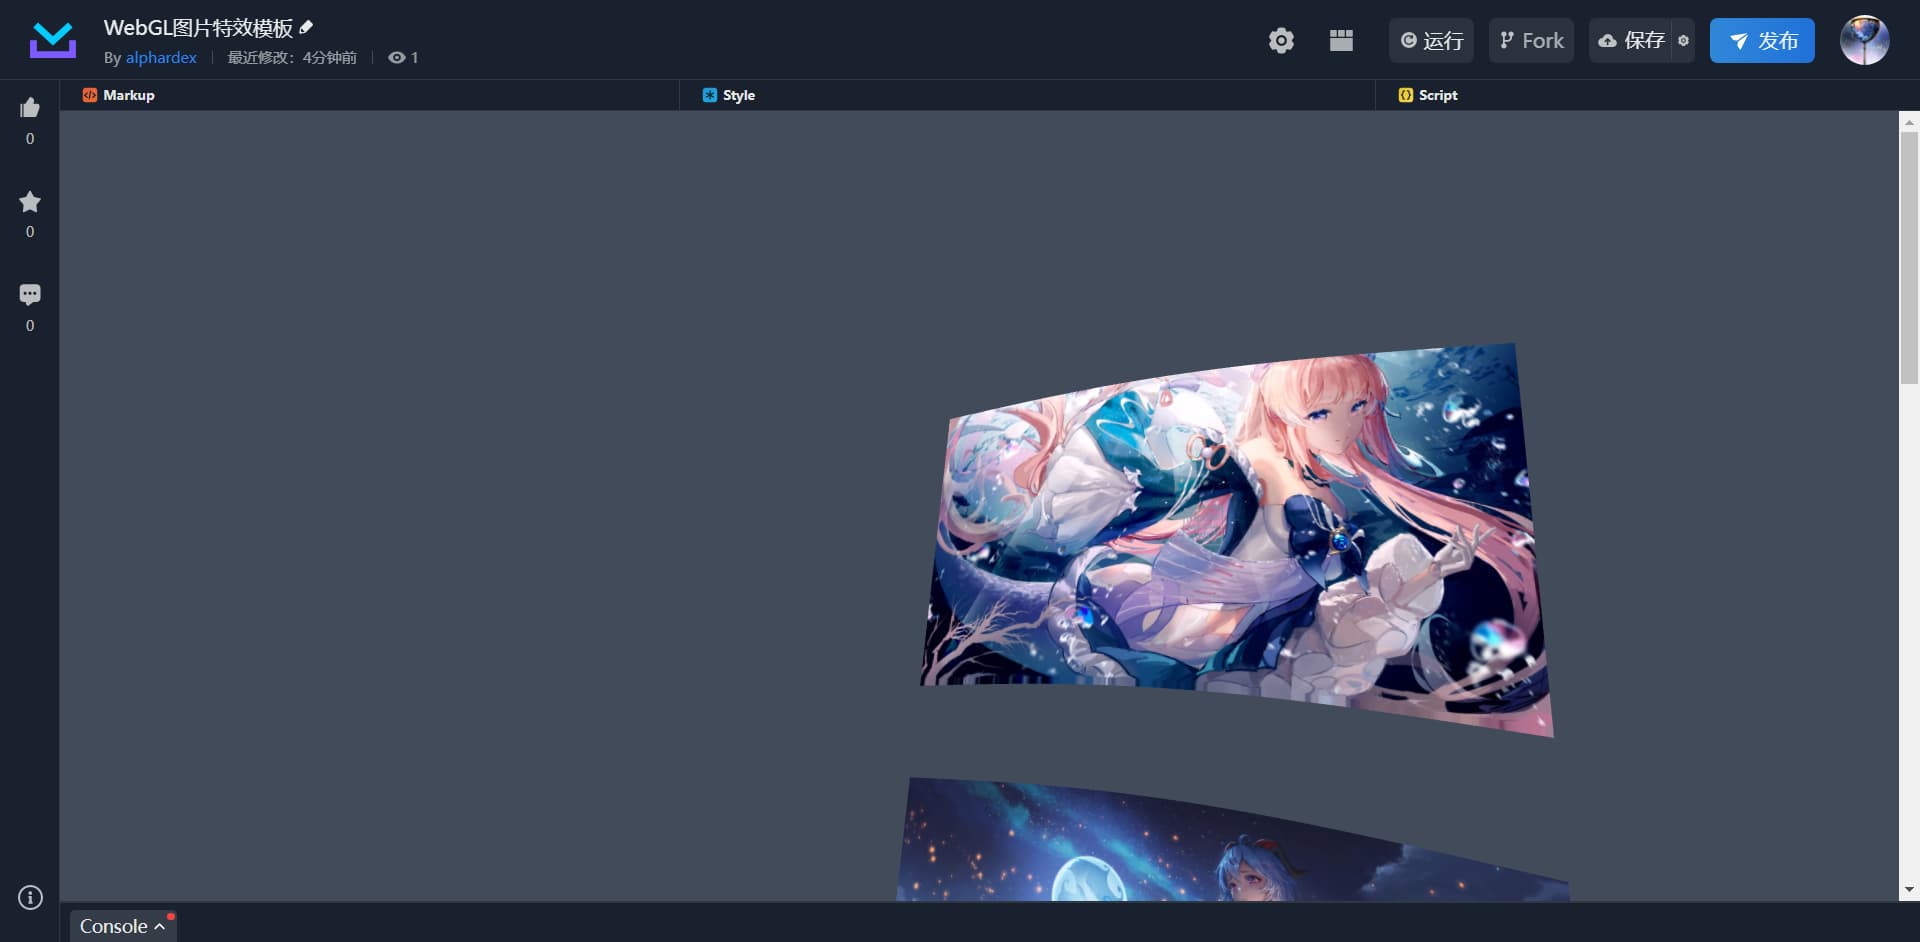
这里依旧用 sin 函数来扭曲它,因为 sin 函数本身就有一种弯曲的美~
找出 C 位图
接下来是本效果最关键的一部分——找出哪张图片处于“C 位”(也就是中心)
首先,在 gallery 中新增一个 uniform 量uDistanceCenter,表示 C 位图到画面中心的距离
1
2
3
4
5
6
7
8
9
10
11
12
13
| const gallary = new kokomi.Gallery(this, {
vertexShader,
fragmentShader,
makuConfig: {
meshSizeType: "scale",
},
uniforms: {
uDistanceCenter: {
value: 0,
},
},
});
await gallary.addExisting();
|
然后,我们就要利用一定的数学计算来算出 C 位的距离和下标
1
2
3
4
5
6
7
8
9
10
11
12
13
14
15
16
17
18
19
20
21
22
23
| const gap = 64;
this.update(() => {
if (gallary.makuGroup) {
const dists = Array(gallary.makuGroup.makus.length).fill(0);
gallary.makuGroup.makus.forEach((maku, i) => {
const sc = gallary.scroller.scroll.current;
const h = maku.el.clientHeight;
const d1 = Math.min(Math.abs(sc - i * (h + gap)) / h, 1);
const d2 = 1 - d1 ** 2;
dists[i] = d2;
maku.mesh.material.uniforms.uDistanceCenter.value = d2;
const activeIndex = dists.findIndex(
(item) => item === Math.max(...dists)
);
this.activeIndex = activeIndex;
});
}
});
|
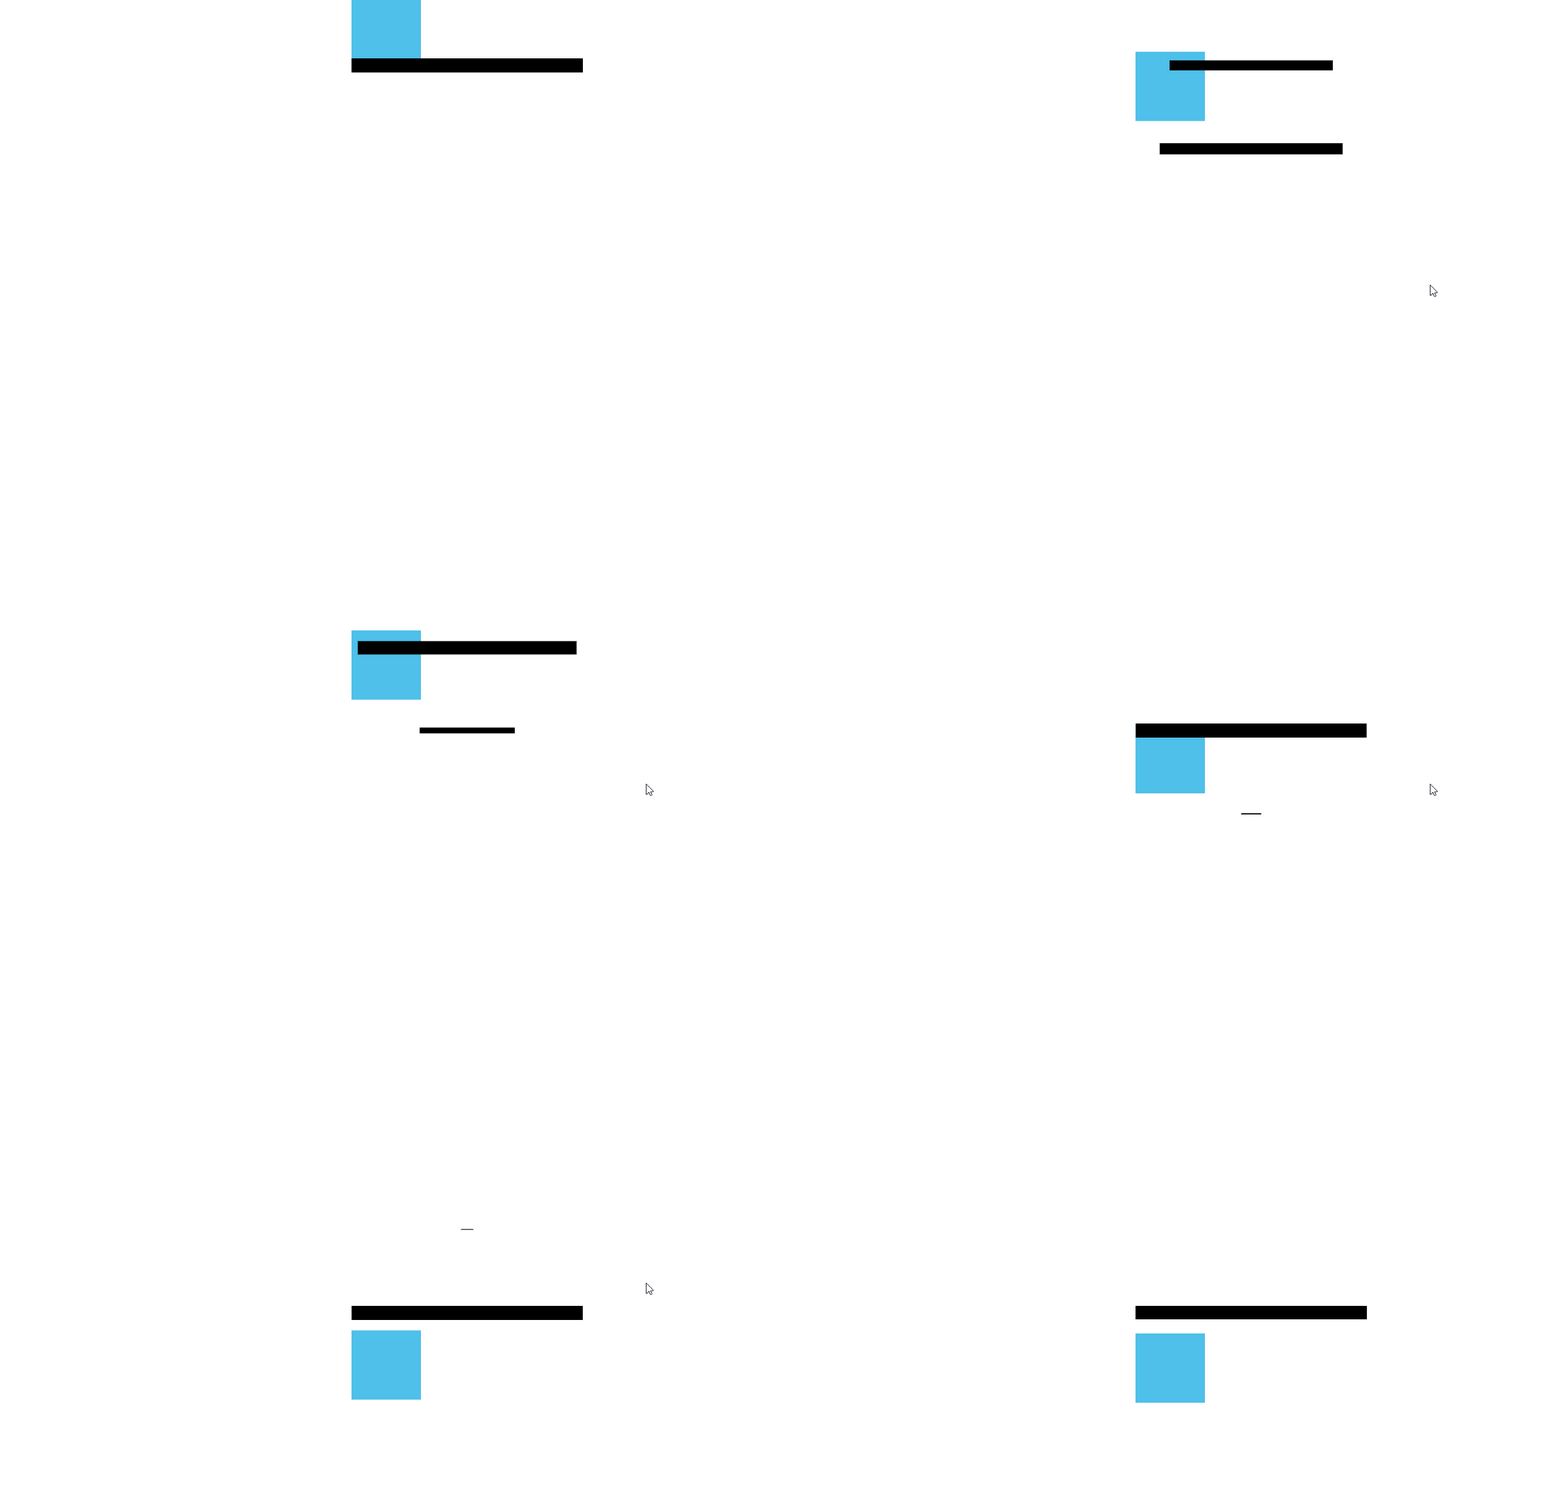
其中gallary.makuGroup.makus是所有图片对象,maku代表一个图片,包含 DOM 部分el以及 WebGL 部分mesh
sc是当前画面已经滚动过的距离,h是每张图片的 DOM 高度
下图是用 DOM 动画描述的公式原理
成功算出 C 位距离后,我们便可以利用它来实现一些 C 位图专属的效果
缩放效果
当图片滚到 C 位时,我们可以通过放大来突显它
编写顶点着色器vertexShader
1
2
3
4
5
6
7
8
9
10
11
12
13
14
15
| uniform float uDistanceCenter;
void main(){
...
p*=(1.+.2*uDistanceCenter);
u=2.*u-1.;
u*=(1.+.2*uDistanceCenter)*.82;
u=(u+1.)*.5;
...
}
|

这里我们既缩放了顶点,也缩放了 uv 坐标(注意缩放 uv 前先要居中下 uv)
颜色滤镜
让 C 位图彩色显现,非 C 位的图直接夺走它的色彩,并且还要降低它的存在感(透明度)
编写片元着色器fragmentShader
1
2
3
4
5
6
7
8
9
10
11
12
13
14
15
16
17
18
19
20
21
| uniform float uDistanceCenter;
vec3 blackAndWhite(vec3 color){
return vec3((color.r+color.g+color.b)/5.);
}
void main(){
vec2 p=vUv;
vec4 tex=texture(uTexture,p);
float alpha=clamp(uDistanceCenter,.4,1.);
vec4 col=vec4(tex.rgb,alpha);
vec4 bwCol=vec4(blackAndWhite(tex.rgb),alpha);
vec4 finalCol=mix(col,bwCol,1.-uDistanceCenter);
gl_FragColor=finalCol;
}
|

这个blackAndWhite可以当成是一个通用的黑白滤镜函数,将其和原图根据 C 位距离混合即可
透明度alpha也用clamp函数限制在一定范围内
操控 DOM
到这里,我们已经基本完成了 WebGL 部分,DOM 部分可能算是锦上添花吧,我们可以将其单独抽成一个函数updateDOM
1
2
3
4
5
6
7
8
9
10
11
12
13
14
15
16
17
18
19
20
21
22
23
| class Sketch extends kokomi.Base {
...
updateDOM() {
const charInfos = [
{ name: "珊瑚宫心海", color: "#d27273" },
{ name: "甘雨", color: "#46a4e1" },
{ name: "神里绫华", color: "#45484f" },
{ name: "雷电将军", color: "#141c4b" },
{ name: "胡桃", color: "#452b2c" },
];
const charNameEl = document.querySelector(".char-name");
this.update(() => {
const activeIndex = this.activeIndex;
charNameEl.textContent = charInfos[activeIndex].name;
gsap.to("#sketch", {
backgroundColor: charInfos[activeIndex].color,
ease: "none",
});,
});
}
}
|
这里主要实现了文字和背景随 C 位距离变化的 DOM 效果,也就是文章头图的预览效果
CSS 与 WebGL
有人看到这可能会有个疑惑:既然 CSS 也有 3D 变换,那我用 CSS 的 3D 变换不也能实现本文的这种效果?
答案是当然可以,只不过有一部分还是无法企及,那就是最微妙的扭曲效果,因为 WebGL 是能够像素级地自由操控图片的,而 CSS 目前暂时还做不到这点(SVG 滤镜也能实现扭曲,但效果也可能很受限)
如果不考虑扭曲、高级滤镜、微粒化等效果的话,光用 CSS 就能实现 99%以上的动画效果了吧
因此结论是如果想实现的效果够简单且线性,用 CSS,想扭曲一切,用 WebGL
最后
希望本教程能给予你创作新特效的灵感~


