前言
大家好,这里是 CSS 兼 WebGL 魔法使——alphardex。本文我们将认识一位新的小伙伴——kokomi.js,她能带给大家绝赞的 3D 创作体验~
kokomi.js 简介
之前创作过很多three.js 相关的作品,但后来发现能复用的东西太少了,并且项目结构也比较混乱。为了解决这两个问题,笔者决定亲手写一个轮子,用来封装 three.js 最常用的一些功能,并且使项目的结构也能变得更加清楚,于是就有了 kokomi.js
她的名字来源:原神的珊瑚宫心海(Sangonomiya Kokomi)
她的 Github 地址:https://github.com/alphardex/kokomi.js
准备工作
本文我们将利用 codesandbox 平台来完成所有的编码工作。账号可以直接用 Github 的账号注册一个
平台地址:https://codesandbox.io
基础场景
创建 ts 模板
首先,我们点击右上角的Create Sandbox,从列表中找到Vanilla Typescript,创建一个最简单的 ts 模板

该步骤地址:https://codesandbox.io/s/typescript-template-rz93pt?file=/src/index.ts
安装 kokomi.js
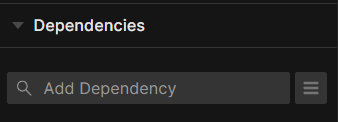
在左边的Dependencies的下方的输入框中,输入kokomi.js,即可安装 kokomi.js
由于 kokomi.js 依赖 three.js,我们也需要安装它以及它的 type:three和@types/three
场景搭建
在 index.ts 中,将我们的 canvas 容器 id 修改为#sketch,同时引入createSketch函数(下文实现)
index.ts
1
2
3
4
5
6
7
8
| import "./styles.css";
import createSketch from "./app";
document.getElementById("app").innerHTML = `
<div id="sketch"></div>`;
createSketch();
|
在 style.css 中,给容器设置一定的样式,使其铺满屏幕
style.css
1
2
3
4
5
6
7
8
9
10
| body {
margin: 0;
}
#sketch {
width: 100vw;
height: 100vh;
overflow: hidden;
background: black;
}
|
新建文件 app.ts,在里面输入如下代码
app.ts
1
2
3
4
5
6
7
8
9
10
11
12
13
| import * as kokomi from "kokomi.js";
class Sketch extends kokomi.Base {
create() {}
}
const createSketch = () => {
const sketch = new Sketch();
sketch.create();
return sketch;
};
export default createSketch;
|
右边画面会报错,提示我们先要配置下 babel
新建.babalrc 文件,在里面拷贝如下代码
.babalrc
1
2
3
4
5
6
7
| {
"presets": ["env"],
"plugins": ["transform-runtime", "@babel/plugin-proposal-class-properties"],
"parserOpts": {
"plugins": ["dynamicImport"]
}
}
|
这时我们能看到一片黑屏,表明 kokomi.js 已经被顺利引入了
接下来让我们创建一个 3D 世界的 Hello World——一个可爱的白色方块
1
2
3
4
5
6
| class Sketch extends kokomi.Base {
create() {
const box = new kokomi.Box(this);
box.addExisting();
}
}
|
可以看到屏幕中心已经出现了一个白色的方块
接下来让我们添加轨道视角
1
2
3
4
5
6
7
8
| class Sketch extends kokomi.Base {
create() {
const box = new kokomi.Box(this);
box.addExisting();
new kokomi.OrbitControls(this);
}
}
|
这样我们就能自由地拖拽画面了
让方块旋转起来吧
1
2
3
4
5
6
7
8
9
10
11
12
| class Sketch extends kokomi.Base {
create() {
const box = new kokomi.Box(this);
box.addExisting();
new kokomi.OrbitControls(this);
this.update((time: number) => {
box.spin(time);
});
}
}
|

恭喜,此刻你已经完成了最基础的 3D 场景的搭建
该步骤地址:https://codesandbox.io/s/kokomi-js-setup-phc3u6?file=/src/app.ts
素材管理
kokomi.js 提供了AssetManager类,用来统一管理素材的加载
定义素材
首先,创建一个 resources.ts 文件,里面定义好素材列表
素材列表对象有 3 个字段:
- name:素材名
- type:素材类型,目前支持 texture(2D 贴图)、cubeTexture(3D 贴图)、gltfModel(模型)、font(字体)
- path:素材路径
resources.ts
1
2
3
4
5
6
7
8
9
10
11
12
13
| import type * as kokomi from "kokomi.js";
import foxModel from "/public/models/Fox/glTF/Fox.gltf";
const resourceList: kokomi.ResourceItem[] = [
{
name: "foxModel",
type: "gltfModel",
path: foxModel,
},
];
export default resourceList;
|
我们引入了一个神子,啊不狐狸的模型,这个模型是从gltf 样例模型中取出来的,也可以替换成自己喜爱的其他模型
加载素材
实例化AssetManager类,并将素材resourceList作为参数传入
监听emitter的ready事件(素材加载完毕事件),读取items里的foxModel,将其加入场景中,即完成了素材的加载
app.ts
1
2
3
4
5
6
7
8
9
10
11
12
13
14
15
16
17
18
19
20
21
22
23
24
25
| import * as THREE from "three";
import * as kokomi from "kokomi.js";
import resourceList from "./resources";
class Sketch extends kokomi.Base {
create() {
new kokomi.OrbitControls(this);
this.camera.position.copy(new THREE.Vector3(6, 4, 3));
const ambientLight = new THREE.AmbientLight(0xffffff, 0.5);
this.scene.add(ambientLight);
const dirLight = new THREE.DirectionalLight(0xffffff, 0.6);
dirLight.position.copy(new THREE.Vector3(1, 2, 3));
this.scene.add(dirLight);
const assetManager = new kokomi.AssetManager(this, resourceList);
assetManager.emitter.on("ready", () => {
const foxModel = assetManager.items.foxModel;
foxModel.scene.scale.set(0.02, 0.02, 0.02);
this.scene.add(foxModel.scene);
});
}
}
|
该步骤地址:https://codesandbox.io/s/kokomi-js-asset-manage-load-in2fcf?file=/src/app.ts
这里有个优化点:可以将 Fox 模型抽成一个class组件,这样可以维护一个属于自己的组件逻辑
组件化
新建文件夹 components,新建 fox.ts,编写狐狸的模型组件
编写组件的基本思路:继承Component类,在里面编写组件的状态逻辑即可,addExisting函数负责将组件添加至场景中,update函数是动画帧,将会同步到场景的全局动画上
fox.ts
1
2
3
4
5
6
7
8
9
10
11
12
13
14
15
16
17
18
19
20
21
22
23
24
25
26
27
28
29
30
31
32
33
34
35
36
37
38
39
40
41
42
43
44
45
46
47
48
49
| import * as THREE from "three";
import * as kokomi from "kokomi.js";
import type * as STDLIB from "three-stdlib";
type ActionName = "idle" | "walk" | "run";
class Fox extends kokomi.Component {
gltf: STDLIB.GLTF;
mixer: THREE.AnimationMixer;
actions: Record<string, THREE.AnimationAction>;
constructor(base: kokomi.Base, gltf: STDLIB.GLTF) {
super(base);
this.gltf = gltf;
const mixer = new THREE.AnimationMixer(this.gltf.scene);
this.mixer = mixer;
this.actions = {};
this.setActions();
}
addExisting(): void {
this.gltf.scene.scale.set(0.02, 0.02, 0.02);
this.base.scene.add(this.gltf.scene);
}
update(time: number): void {
const delta = this.base.clock.getDelta();
this.mixer.update(delta);
}
setActions() {
this.actions.idle = this.mixer.clipAction(this.gltf.animations[0]);
this.actions.walk = this.mixer.clipAction(this.gltf.animations[1]);
this.actions.run = this.mixer.clipAction(this.gltf.animations[2]);
}
playAction(name: ActionName = "idle") {
const prevAction = this.actions.current;
const nextAction = this.actions[name];
nextAction.reset();
nextAction.play();
if (prevAction) {
nextAction.crossFadeFrom(prevAction, 1, true);
}
this.actions.current = nextAction;
}
}
export default Fox;
|
将该组件应用至主场景
app.ts
1
2
3
4
5
6
7
8
9
10
11
12
13
| import Fox from "./components/fox";
class Sketch extends kokomi.Base {
...
create() {
...
this.assetManager.emitter.on("ready", () => {
const fox = new Fox(this, this.assetManager.items.foxModel);
fox.addExisting();
fox.playAction("idle");
});
}
}
|
这里的 fox 实例拥有着属于自己的功能和状态,这样当我们创建别的class时就不会出现功能上的重复冲突
该步骤地址:https://codesandbox.io/s/kokomi-js-asset-manager-13008e?file=/src/app.ts
特效创作
新建 shader 文件夹,并在里面新建fragment.glsl片元着色器,里面拷贝如下代码
1
2
3
4
5
| void mainImage(out vec4 fragColor,in vec2 fragCoord){
vec2 p=fragCoord/iResolution.xy;
vec3 color=vec3(p,0.);
fragColor=vec4(color,1.);
}
|
主场景中,实例化ScreenQuad类,开启shadertoyMode,引入片元着色器
app.ts
1
2
3
4
5
6
7
8
9
10
11
| import fragmentShader from "./shaders/fragment.glsl";
class Sketch extends kokomi.Base {
create() {
const screenQuad = new kokomi.ScreenQuad(this, {
shadertoyMode: true,
fragmentShader,
});
screenQuad.addExisting();
}
}
|
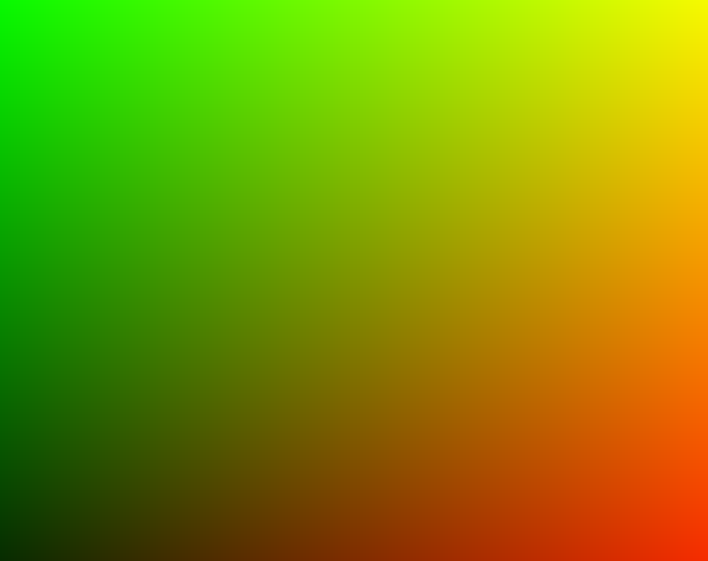
可以看到 uv 平面显示了出来,在上面我们可以进行 Shader 的创作
该步骤地址:https://codesandbox.io/s/kokomi-js-shader-jbzygu?file=/src/app.ts
比如说 Shadertoy 上最常见的 Raymarching
该 demo 地址:https://codesandbox.io/s/raymarching-primitives-tqfuf8?file=/src/app.ts
最后
本文带大家初步认识了 kokomi.js。接下来笔者还会继续不断地完善她,敬请期待。